Lorem ipsum dolor sit amet, consectetur adipiscing elit, sed do eiusmod tempor incididunt ut labore et dolore magna aliqua. Ut enim ad minim veniam

Liquid error: Memory limits exceeded
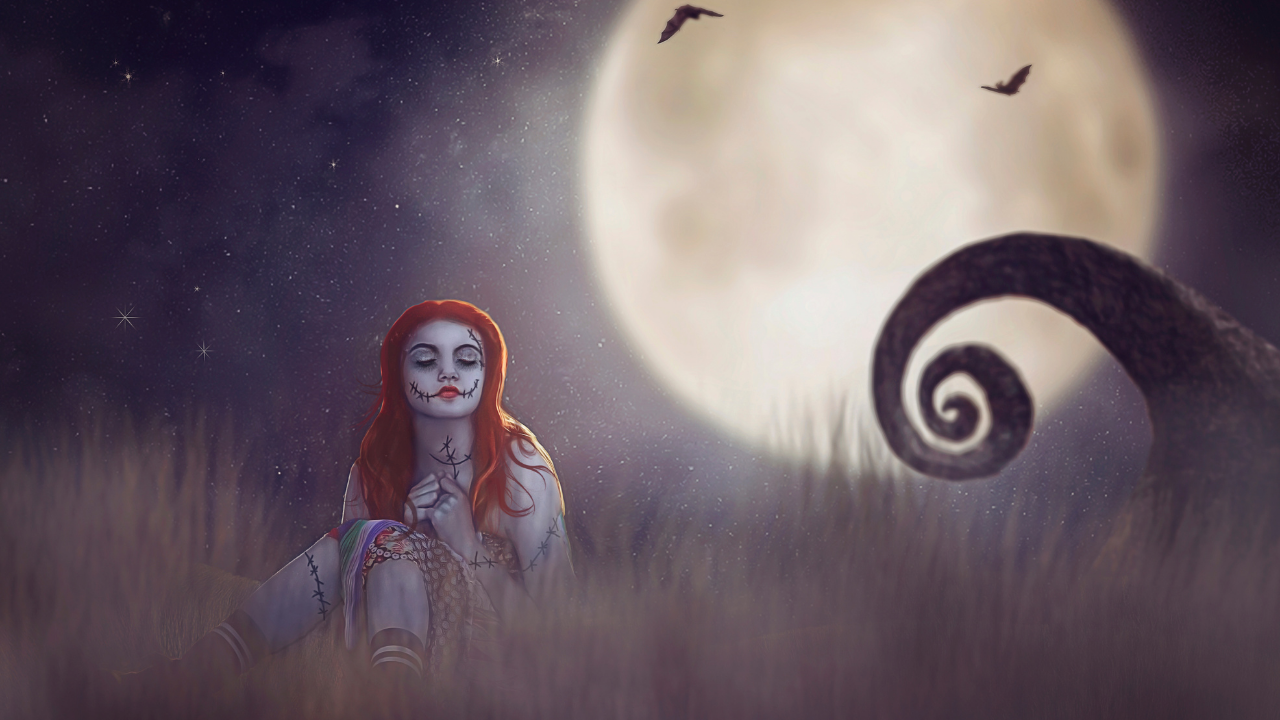
Sally in the Moonlight
Apr 16, 2022
Hey Guys!
We will be making a fun Nightmare Before Christmas-themed composite for this spooky tutorial. First, I will provide you with the background, and we can build from there.

The image we’re going to use for our subject was already edited. I often use a RAW image, but in this situation, I wanted to show you how we can still use an already edited image in a composite piece.

We’re going to cut out our subject, paste her onto our background, and resize her. You’ll notice just how out of place she looks right away! But, not to worry, we’ll blend her in by using several background layers and filters! You can check out my full tutorial, available through my premium membership, to see how I do it.
After blending her, we will use “Match Color” on our subject, using our background as the source to make her luminosity a little more like our background.

Since we want her to look like she’s sitting in the grass, we’re going to mask her and brush some of her feet and dress off. She seems like the grass is popping out from around her.
We will use our masks to clean up some of the haziness from her hair. After that, we will go back to our grass and add in some more grass using our PixelSquid plugin. Finally, we’re going to make some adjustments so that our grass looks more like the grass we already have and belongs in our image.
Once we have our grass lovely and dark, we will hop back on our PixelSquid plugin and bring in some spooky creatures! I brought in a few bats and went in and made adjustments to them so that they matched our mood.

We’ll play around with her skin now, giving her a blue-ish tone and a tad more contrast and pop. Then, using a solid blue layer, we will brush our blue onto her skin, making sure to avoid the hair, lips, and eyebrows. Then I’ll create her highlights and shadows. You can watch my full video tutorial available through my premium membership to see how I do this.

I’m going to add a gradient to create a moonlight effect. Then we will add a warming filter to bring back some of our colors. Finally, we will run the painterly action to wrap everything up because it brings out so much detail in my image.
And that’s it! I hope you enjoyed this tutorial, and looking forward to seeing all your creations on the Facebook group and Instagram! Check out my premium membership for a step-by-step walkthrough of this tutorial and dozens of others!

Subscribe to our newsletter

Follow us on your favorite socials
Shop our Etsy Store
Explore
Resources
Connect
@2024 TARA LESHER | All Rights Reserved