
Liquid error: Memory limits exceeded
A simple summer edit that makes a big splash!💦
Apr 18, 2022
Hello, fellow creators!
I had a Whale of a good time with this edit...( see what I did there?)😁
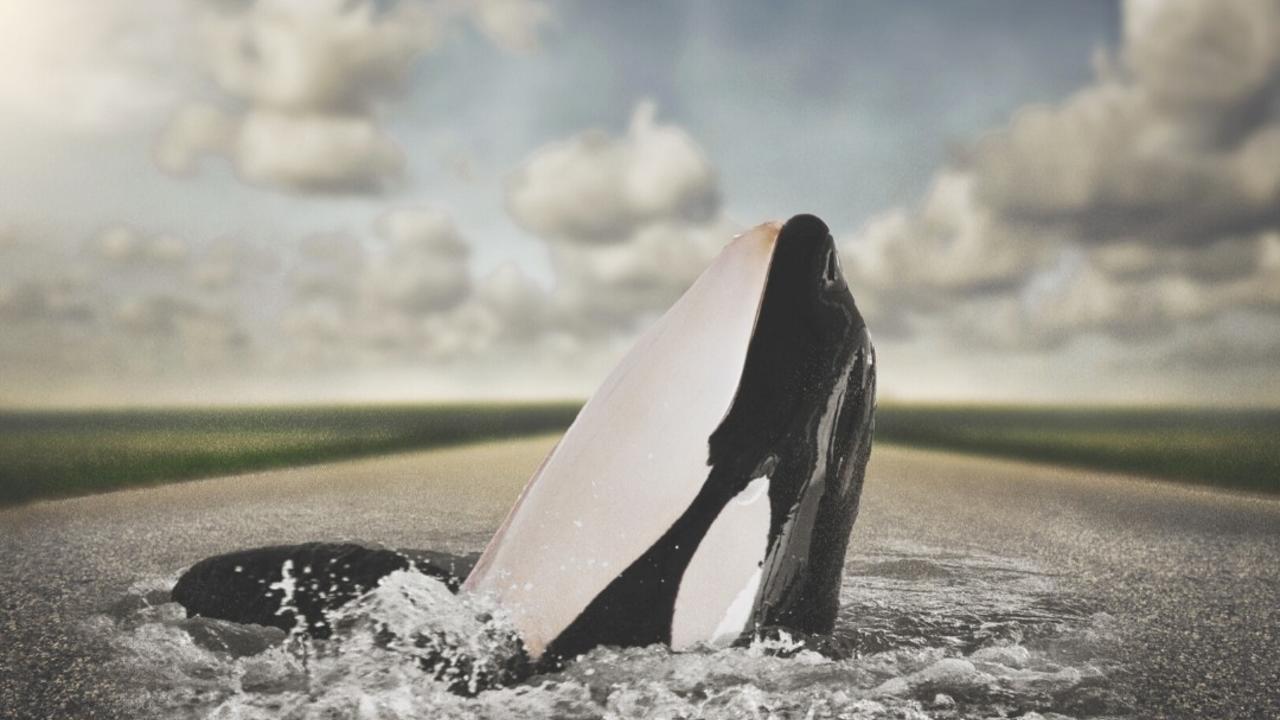
This week's live streaming tutorial, "Roadblock Whale," is found in the Compositing Hand edits category. Tara shows us a fun, surreal-vibe edit using only two stock images from Deposit Photos.
Deposit Photos is a premium site Tara personally uses. Unfortunately, it is required to pay for each image or package. But don't worry. There is a TON of free stock sites available.
Pixabay and Freeimages.com are just a few from the list.
Setting the scene
You can choose any scene or other aquatic creature you wish. Maybe a field of flowers emerging from the moon's surface or even a backcountry road versus payment? The techniques learned in this tutorial have a wide range of uses.
Make a Big Splash! 
Here you will select to pick up the splash and background water around the whale. Next, copy (command C) and Paste (command V) the whale onto the road and insert a bounding box (comment T) to enable us to move him.

Brushing our way to clean lines
Next, after applying a mask on our whale and a hard black brush, we want to clean up the perimeter. Again, take your time brushing around to make the lines nice and straight.
After switching to a soft black brush, we can begin working around the edges to take off some of the water.
Editing tip: You will notice you don't have to be perfectly straight with your lines on this one, so have fun playing in the water!
Bring in the Color! 
We learn how executing our hue saturation correctly, depending on our image, can bring all the playful surrealism effects to life.
By adjusting the color saturation, bringing down the yellows and greens, then blues, you will watch the water fade from color to almost translucent.
See the complete steps taken by adjusting the midpoint, using brushes, and a bit of dodge and burn to blend it all beautifully.
Editing tip: If some of the highlights are just a bit much, editing them down in the curves layer helps greatly.
Bring on the Layers
To blend the whale into the background, make a new layer (control/command J) of the background, and using the HSL adjustment, we can bring down the yellows and greens to desaturate a bit. Again, try focusing on crop vignetting to make the whale stand out.
Editing tip: merging the images after each editing step minimizes the number of layers open and makes navigating your panel much easier!
A rough brush blends the water into the pavement for us. And by dabbing around the edges, we create an effect of the water seemingly dripping onto the pavement.
I loved this editing step because I can see how such a slight edit makes such a big difference!
Shining some light on the subject-subject lighting is a critical element in this edit that plays up the light and airy surreal theme.
If we lower the opacity using a soft round brush, you can create a ray of light shining right onto the whale.
Creative tip: Playing with color and lighting here is an excellent practice for your editing eye to wander over your image and notice how the global colors make elements within your image pop.
 Finally, Tara shows us a light flare technique on a solid background layer.
You can drag the flare up into the clouds for an additional spotlight on the whale.

This tutorial engages you with light in your editing style, and you can see how refining small details and elements translate to significant changes in your image.
Remember, experimenting is the ultimate key to creating fun images you enjoy, and this whale certainly makes a fun splash just in time for summer!
Creatively Yours,
Kristin Mantta- Premium Member
Subscribe to our newsletter

Follow us on your favorite socials
Explore
Connect
@2024 TARA LESHER | All Rights Reserved