Rosie the Riveter Hand Edit
Hello Friend,
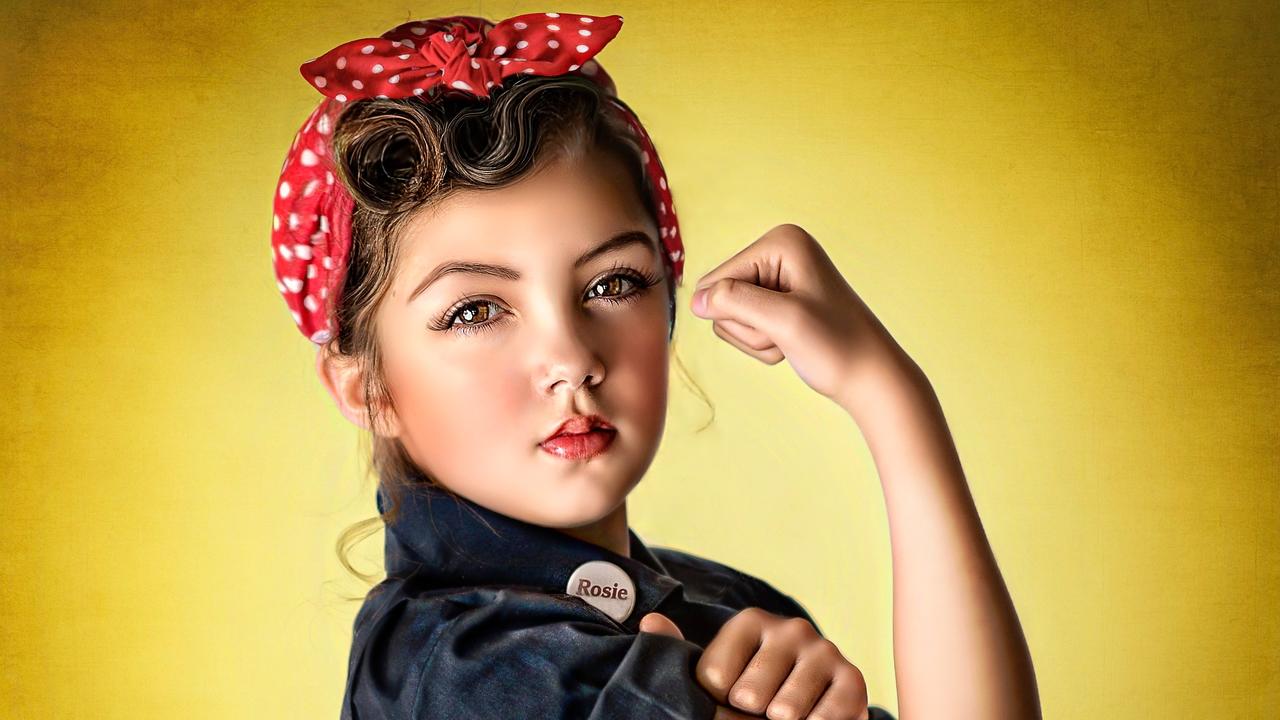
This Rosie the Riveter project is one of my favorite dramatic edits to revisit. For this version, I wanted to capture the same bold, caricatured look of the original poster, using tools like Liquify, Dodge, and Burn to give the image a strong, cartoon-inspired feel.
If you want to follow along step by step, the full start-to-finish tutorial is available inside the Access Membership.
I created a similar edit years ago, but now that the model is a little older, it felt like the perfect time to refresh the concept with a more polished, expressive style.
This lesson is detailed, with many small adjustments that gradually build into the final transformation. Each step is intentional, easy to follow, and designed to help you understand how to create dramatic character edits with confidence.

When I photographed this image, I didn’t realize she was facing the opposite direction of the classic Rosie pose. The first step in the edit was a simple flip to align everything.
From there, I moved to frequency separation to smooth the skin while preserving its natural texture. The goal was to blend the tones and highlights without losing detail, especially since this edit leans into a stylized, almost illustrated look.
Inside the full tutorial, I walk through each step slowly so you can see exactly how I approached the blend and texture work. If you’re interested in learning more, the Access Membership includes more than five hundred tutorials, many of them exploring different ways to use frequency separation in your edits.

The skin and beauty work for this edit were very intentional. I spent extra time shaping and refining the eyebrows to match the strong, arched look from the original Rosie the Riveter poster. Those little details make such a big difference in capturing her iconic expression.
I also ran one of my sharpening actions over the key facial features to bring out the definition and give the edit a crisper, illustrated feel.

To play off the original Rosie the Riveter, I chose a yellow background. I did add some textures to the edit.

To bring everything together, I added a final round of dodge-and-burn to enhance the highlights and shadows. This gave the edit more depth and helped the dramatic style really stand out. I also lifted the clarity, darkened the edges for a subtle vignette, and used the warp tool to add a hint of muscle to her pose. In my earlier Rosie edit, I went all in with the muscles and had so much fun with it, so this was a playful nod to that version. The last touch was adding the eyelashes to complete her look.
If you want to watch the whole process, you can join the Access Membership and enjoy this tutorial, along with more than 500 others waiting for you inside.
Happy Editing
Tara Lesher
Want to keep learning with me?
Drop your name below, and I’ll send you creative tips, new tutorials, and the good stuff I only share by email.
No pressure. Just inspiration when you want it.
We hate SPAM. We will never sell your information, for any reason.
