
Liquid error: Memory limits exceeded
How to: Submerge a Room in Water
Apr 17, 2022
Hey everyone,
I recently did a tutorial on how I flood a room or submerge it in water using photoshop. You can view the full tutorial by signing up for the premium membership.
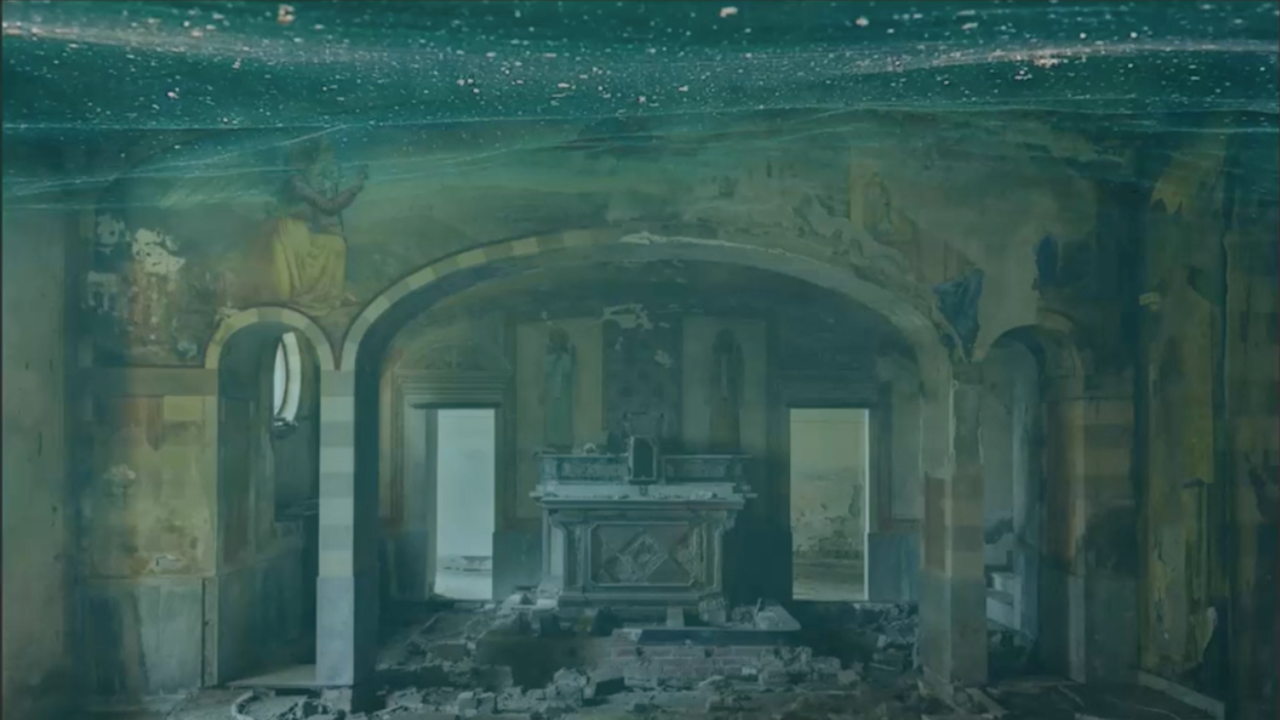
This can be an excellent effect if you want to add people floating around, objects or if you’re looking to add water to a fishbowl or a vase. But, of course, the same techniques would be applied to any of these.

I got my image from Adobe Stock; I thought it would be an excellent image to submerge in water. Even though this image was terrific, a few things make me not want to use it for an accurate composite only because there appears to be a door with light coming in on the side and two open doors in the background. If we’re realistic, I won't choose a room with open doorways or windows.
In my tutorial, I showed three different ways to submerge a room in the water. Sign up for my premium membership to watch the full tutorial.

For the first technique, I flooded a portion of the room. I mainly focused on creating the surface of the water. This is what gives the illusion of the flood. In the tutorial, I demonstrated two different ways to add the surface to provide you with some options. For the part of the underwater image, I added a distortion effect to make it look a little bit more like it’s underwater.

If you want to make the whole room underwater, you can add an overlay to the image. I showed this as the second technique. This technique is probably the one I would do in real life. I added a mask to the overlay and brushed some of it off to lower the opacity. Then, I warped the image to make it look a little more natural. You can make adjustments to your preference.

In the last technique, I added the flood plug-in for photoshop. It won’t give the same effect as a submerged room because you won’t be able to see through it. In my full tutorial, I gave the exact settings I used to create the image.
When applying any of the techniques, you want to add any adjustments you prefer. It is pretty simple!
Sign up for my premium membership to watch the step-by-step tutorial.
Happy Editing!
Tara Lesher
Subscribe to our newsletter

Follow us on your favorite socials
Explore
Connect
@2024 TARA LESHER | All Rights Reserved