Clean Color Grading with Gradients in Photoshop
Hey everyone,
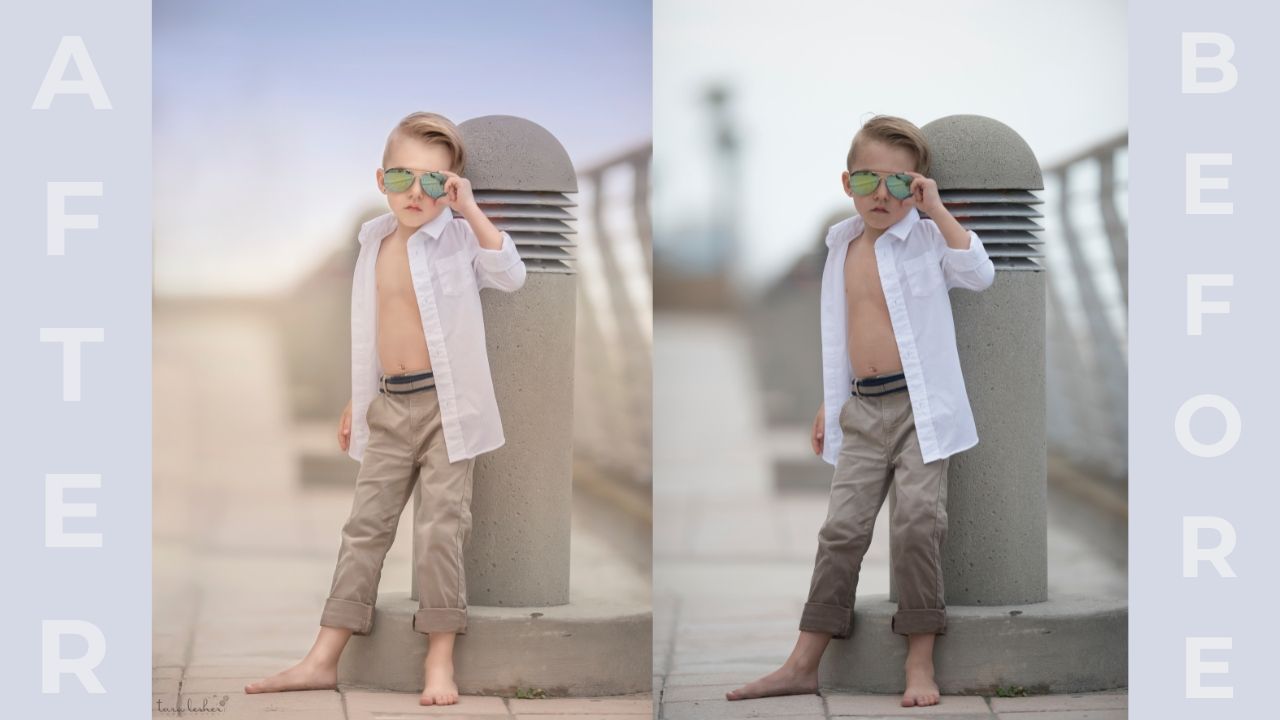
When I was working on this image, my goal was simple. I wanted this little boy to stand out more, without turning the photo into something that felt overworked or painted.
Most of that came down to a few basic adjustments and a lot of attention to color.
Color techniques are often the quiet part of an edit. They’re not flashy, but they’re usually the reason an image starts to feel finished. In this case, gradients played a big role in how the tones came together and how the subject separated naturally from the background.

I also leaned on curves to make small, targeted adjustments. It’s one of those tools that can do a lot without calling attention to itself. In this image, I used it to even out tones and make subtle color changes, helping everything feel more balanced.

Before adding anything creative, I always clean up distractions. Removing small background elements and refining the subject helps guide the eye exactly where I want it to go. Tools like spot healing make this process simple, whether you’re just starting or you’ve been editing for years.

One thing I’m always careful about is keeping an image from looking flat or overdone. When a subject fills most of the frame, it’s easy to push things too far. Instead, I prefer gentle dodging and burning to naturally enhance features like skin, hair, and clothing, just enough to bring back depth in the image.

Once the image feels clean and balanced, that’s when color really gets to do its work. Gradients are one of my favorite ways to tone an image because they let you experiment without committing too hard. A slight color shift can completely change the mood while still keeping the photo realistic.

That was the goal here. I wanted this edit to feel natural, simple, and intentional, not like a painting, just a polished version of the moment that was already there.
If color has ever felt like the most challenging part of editing to put into words, you’re not alone. It’s a skill that develops over time, and noticing it is the first step.
Happy editing,
Tara
Ready to keep learning with me?
This blog gives you one helpful piece of the process, but when you unlock All Access, I walk you through complete Photoshop edits that include time-saving assets.
You can pause, rewind, follow along at your own pace, and build the kind of edits you are excited to finish.
With 500+ Photoshop, compositing, portrait editing, and creative effect tutorials waiting for you, All Access gives you a full library of guidance for your next project.